Introduction
Here we are to another article of the PiCamera & Python series. In this article you will see how to apply filter effects to images captured via webcam.
This article is the PiCamera v2, that the Raspberry Pi Model B 3 card have been used, however, all codes and arguments remain in effect for previous models.
Preliminary steps: acquiring an image
Before you begin, you must start with the preliminary step: the simple acquisition of a photo by PiCamera webcam. Assuming that you have already read the other articles, here is the starting code. This code will allow you to take a picture, and save it as a JPG file on the current directory.
Open a text editor and create a file called effects01.py.
nano effects01.py
Then write in it the following code:
from picamera import PiCamera
import time

camera = PiCamera()
camera.resolution = (2592, 1944)

camera.start_preview()
time.sleep(5)
camera.capture('image01.jpg')
camera.stop_preview()
By running the program you will not have more than a picture taken by the webcam.
Applying Filter Effects
Now you can begin to apply various filter effects on images acquisition.
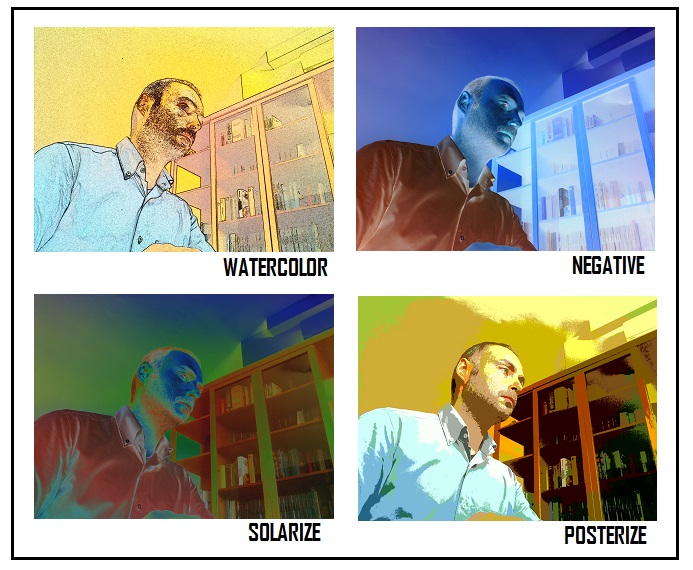
In fact, there are a number of effects already set within the Picamera Python Library that can be applied to images. The only thing you need to do is set them within the previous code using the image_effect parameter belonging to the object Picamera.
You can start with a filter effect called colorswap. Then, add the following statement after the start_preview ()
camera.image_effect = 'colorswap'
and you have a picture with colors replaced by their complementary.
To familiarize yourself with all the effects present in picamera library, I suggest to use the following program.
Open a text editor and create a file called effects02.py.
nano effects02.py
and write the following code:
from picamera import PiCamera
import time

camera = PiCamera()
camera.resolution = (2592, 1944)

camera.start_preview()
time.sleep(5)

for effect in camera.IMAGE_EFFECTS:
    filename = "image_%s.jpg" % effect
    camera.image_effect = effect
    camera.capture(filename)
    time.sleep(1)
camera.stop_preview()
This program will apply every effect available in picamera library. Effect after effect, Raspberry will take a picture by applying a different effect each time.
In the current directory you will find a series of image files with effect name as suffix (i.e. image_colorswap.jpg)
That’s review of some very interesting filter effects
Working on some adjustments
There are also some special settings that allow you to adjust certain aspects of the image in conjunction with the previous effects.
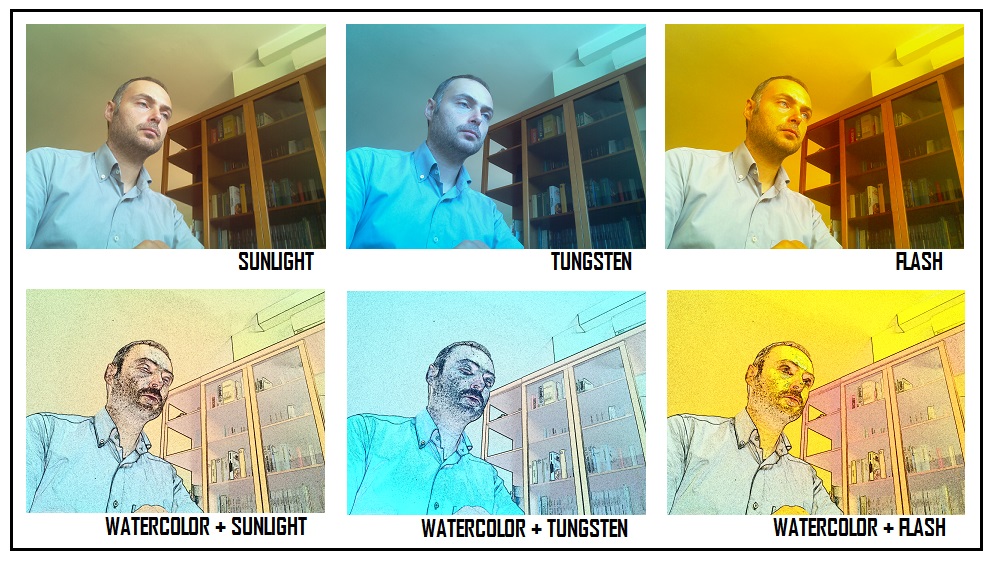
For example, you can adjust the white balance through awb_mode parameter. This parameter has a number of options that you can select. The name of these options describes the type of light source “simulated” to be applied to the subject of the photo.
Here is the list of options: off, auto, sunlight, cloudy, shade, tungsten, fluorescent, flash and horizon.
Then you simply add the following statement before capturing an image to set the white balance mode (If you want to set ‘sunlight’)
camera.awb_mode = 'sunlight'
If you run the program by combining the white balance and effects, you can have several nice effects. Here’s an example in the following figure.
The exposure is another type of adjustment on which you can work. That is, the exposure time can play an important role on the the acquired image performance. The light and shade effect will vary greatly depending on the selected exposure mode.
To adjust the exposure you have to define the exposure_mode parameter, assigning a few options available.
Here is the list of options: off, auto, night, nightpreview, backlight, spotlight, sports, snow, beach, verylong, fixedfps, antishake fireworks.
Again you can assign the option to exposure_mode parameter within the code just before the image capture.
picamera.exposure_mode = 'beach'
If you do various tests, you will see that by varying the options you will have different light and shade effects, which when combined with a special effect, can give a good result.
Conclusions
In this article you how to apply various effects to the image acquisition in order to obtain artistic images or at least interesting ;). Also you saw how to work on some adjustments to modify the effects on images. I hope that what you saw today will inspire you for further study …. and who knows … mix art to the technique is always good.
[:]


