There is a lot of talk about musical scales, of music at 440Hz and 432Hz without at times understanding the meaning of it. In this article we will see how to generate musical scales, the theory behind them, and how to create music at 440Hz or 432Hz. We will do it all using an Arduino board, and a small speaker (or buzzer).
The musical scale and the corresponding frequencies
Western music is based on particular musical scales, called octaves, composed of 12 notes, or to be precise, of 7 interspersed notes (DO, RE, MI, FA, SOL, LA, SI) with 5 semitones of passage (DO # or REb, RE # or MIb, FA # or SOLb, SOL # or LAb, LA # or SIb).
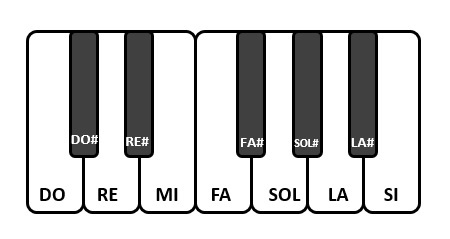
Or in the Anglo-Saxon system the notes are instead indicated with the first 7 letters of the alphabet, starting however from the note LA (A). You will therefore have the notes A (LA), B (SI), C (DO), D (RE), E (MI), F (FA) and G (SOL).

It is interesting that the Anglo-Saxon notation starts with the note LA. It is no coincidence that, by convention, all musical instruments are tuned keeping the note LA present on the fourth octave (LA4 or A4) of the entire musical scale as the reference frequency. Today all musical instruments are tuned making sure that the note LA4 corresponds to the frequency 440Hz.

The entire musical scale has been divided into 8 scales of 12 notes called precisely octaves. These correspond to precise frequency ranges. For example, the octave that goes from LA4 to LA5 covers a range of 440Hz, which is no coincidence that it is also the reference frequency of LA4. So we will have LA4 at 440 Hz and LA5 at 880 Hz.
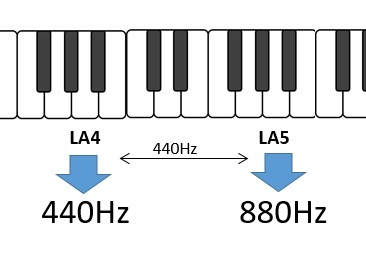
Each LA in the lower octave will correspond to half the LA frequency in the upper scale, and so on throughout the musical scale. So we will have the frequency ranges (octaves) that will double as the octaves grow.

Music at 440Hz or 432Hz?
But it wasn’t always like this. In fact, until a few decades ago, the reference value had been that of 432Hz (in reality it was not the only one). So a 432 Hz music is nothing more than a melody played with instruments tuned to an LA4 at that frequency. So all frequency values will change, but the rules are always the same.

There is a lot of talk on the web regarding the reasons for this change in the frequency of reference. The available explanations are not clear, some of which are completely different or almost discordant. In order to have a certainty on this topic it would be necessary to do research on original written documentation and to avoid absolutely the confusion generated on the web.
| Octave | Scale at 440 Hz | Scale at 432 Hz |
|---|---|---|
| A0 | 27.5 Hz | 27 Hz |
| A1 | 55 Hz | 54 Hz |
| A2 | 108 Hz | 110 Hz |
| A3 | 220 Hz | 216 Hz |
| A4 | 440 Hz | 432 Hz |
| A5 | 880 Hz | 864 Hz |
| A6 | 1760 Hz | 1728 Hz |
| A7 | 3520 Hz | 5456 Hz |
Regardless of the reasons, however imaginative or correct they are, in this article we will provide all the tools necessary to build a musical base on these two scales (Scale at 440Hz and 432Hz), or even on other alternative scales, leaving you the task of experience the differences regarding the emotions or sensations aroused.
Calculation of the frequencies of the notes
Now that we understand how the 440Hz and 432 Hz musical scales are based, let’s go one step further. Once we established how often to work on LA4, we saw how easy it is to calculate the various frequencies corresponding to all the other LA notes on the musical scale. But within each octave there are 12 notes to calculate. How you do it?

For the calculation of the frequencies corresponding to the 12 notes present within an octave there is a particular mathematical procedure, which is based on the multiplication of the base frequency (i.e. that of the LA) by a certain value βn between 1 and 2, and where n is the number of the corresponding note (from 0 to 12).

So we calculate the 12 values of β raised to the different powers with the use of a scientific calculator. We will get the following values.
| β0 | 1.0000 |
| β1 | 1.0595 |
| β2 | 1.1225 |
| β3 | 1.1893 |
| β4 | 1.2601 |
| β5 | 1.3351 |
| β6 | 1.4145 |
| β7 | 1.4986 |
| β8 | 1.5878 |
| β9 | 1.6823 |
| β10 | 1.7824 |
| β11 | 1.8884 |
| β12 | 2.0000 |
Now to have the frequencies of the notes between LA4 and LA5, it is sufficient to multiply these values βn by the reference frequency.
| LA4 | β0 x 440 Hz | 1.0000 x 440 Hz | 440 Hz |
| LA#4 | β1 x 440 Hz | 1.0595 x 440 Hz | 466 Hz |
| SI4 | β2 x 440 Hz | 1.1225 x 440 Hz | 494 Hz |
| DO5 | β3 x 440 Hz | 1.1893 x 440 Hz | 523 Hz |
| DO#5 | β4 x 440 Hz | 1.2601 x 440 Hz | 554 Hz |
| RE | β5 x 440 Hz | 1.3351 x 440 Hz | 587 Hz |
| RE#5 | β6 x 440 Hz | 1.4145 x 440 Hz | 622 Hz |
| MI5 | β7 x 440 Hz | 1.4986 x 440 Hz | 659 Hz |
| FA5 | β8 x 440 Hz | 1.5878 x 440 Hz | 698 Hz |
| FA#5 | β9 x 440 Hz | 1.6823 x 440 Hz | 740 Hz |
| SOL5 | β10 x 440 Hz | 1.7824 x 440 Hz | 784 Hz |
| SOL#5 | β11 x 440 Hz | 1.8884 x 440 Hz | 831 Hz |
| LA5 | β12 x 440 Hz | 2.0000 x 440 Hz | 880 Hz |
We can evaluate the same thing for the 432 Hz based music scale.
| LA4 | β0 x 432 Hz | 1.0000 x 432 Hz | 432 Hz |
| LA#4 | β1 x 432 Hz | 1.0595 x 432 Hz | 458 Hz |
| SI4 | β2 x 432 Hz | 1.1225 x 432 Hz | 484 Hz |
| DO5 | β3 x 432 Hz | 1.1893 x 432 Hz | 514 Hz |
| DO#5 | β4 x 432 Hz | 1.2601 x 432 Hz | 544 Hz |
| RE | β5 x 432 Hz | 1.3351 x 432 Hz | 577 Hz |
| RE#5 | β6 x 432 Hz | 1.4145 x 432 Hz | 611 Hz |
| MI5 | β7 x 432 Hz | 1.4986 x 432 Hz | 647 Hz |
| FA5 | β8 x 432 Hz | 1.5878 x 432 Hz | 686 Hz |
| FA#5 | β9 x 432 Hz | 1.6823 x 432 Hz | 727 Hz |
| SOL5 | β10 x 432 Hz | 1.7824 x 432 Hz | 770 Hz |
| SOL#5 | β11 x 432 Hz | 1.8884 x 432 Hz | 816 Hz |
| LA5 | β12 x 432 Hz | 2.0000 x 432 Hz | 864 Hz |
Arduino and the generation of sound waves
But how do electronic devices generate sound waves through speakers? Electronic devices such as Arduino? Well, it’s actually very simple. It connects to our control board, in this case Arduino, any sound device such as a speaker or a simple buzzer. Then through special commands it will be vibrated at the frequency of the corresponding notes.
Arduino is a board that allows you to do this very simply. Once the sound device is connected to one of the Arduino ports, the latter will be commanded to activate and deactivate (ON and OFF) the output port at the desired frequency.
Then from the door a train of square wave impulses will be produced, with a duty cycle of 50%.

The length in time of the pulses is equivalent to the wavelength λ, which is equivalent to the inverse of the frequency 1 / f. So to reproduce the note LA4, corresponding to 440 Hz, it is necessary to generate a train of pulses with wavelength t = 1 / f = 2.2727 ms.

The sound device subjected to this train of impulses will emit a perfect LA even if a little dirty, since the generating wave is a square wave and not a sine wave.
But now let’s move on to programming, to generate the square wave we just talked about on the Arduino boards, choose a port on which to generate it, such as PIN 9, and set it as OUTPUT
void setup() {
pinCode (3, OUTPUT)
}
And then we generate the square wave, setting PIN 3 to the HIGH state and keeping it for 1136 microseconds (half the wavelength), using the delayMicroseconds () function.

Then I set PIN 3 to the LOW state and keep it still for 1136 microseconds. And then repeating everything in a loop, all you do is generate a train of impulses, that is, the square wave that we have described above.
void loop() {
    digitalWrite(3, HIGH)
    delayMicroseconds(1136)
    digitalWrite(3, LOW)
    delayMicroseconds(1136)
}
This way we will get the LA4 note from the sound device.
The necessary material
As for this article I used the Seeeds Arduino Nano model and its speaker (Grove).
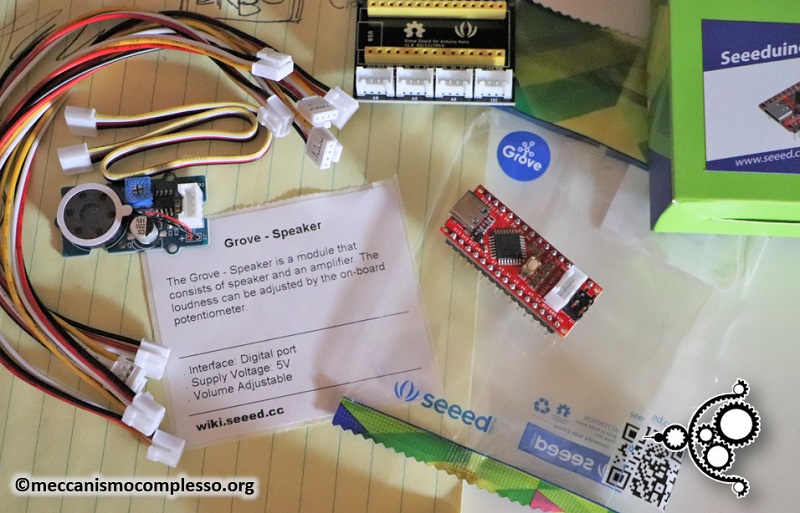
But you can use any Arduino model and connect it with any sound device. The principles will remain basically the same.
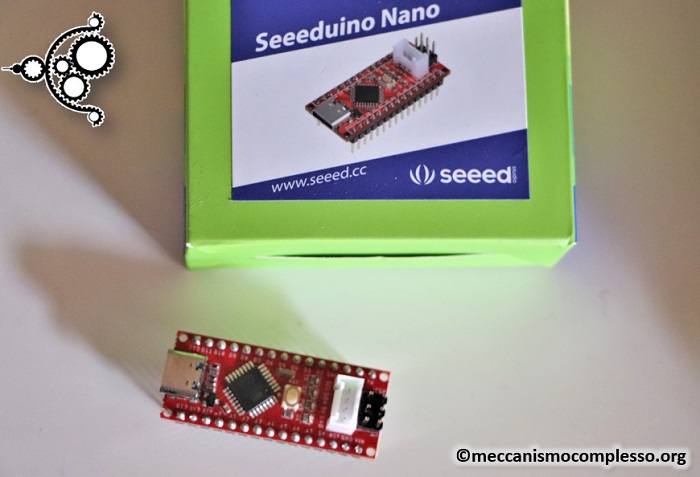
Seeeduino Nano
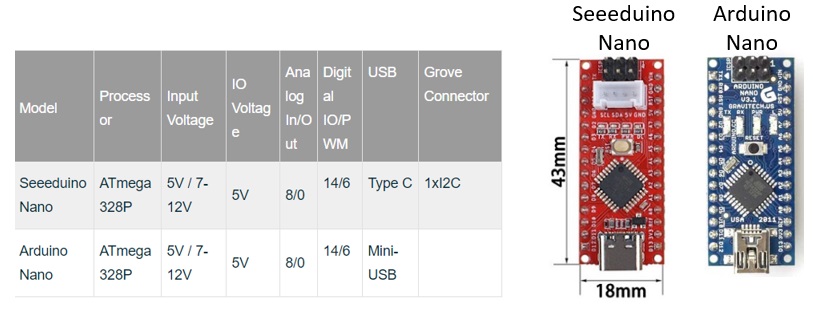
Seeeduino Nano is a compact board fully compatible with Arduino Nano, fully retaining its same dimensions and pin scheme. But there are some differences between the two models.
The first of all is the price, in fact Seeeduino Nano offers all the same characteristics of Arduino Nano, but at a price that is roughly half. It also has some improvements not to be underestimated such as the Mini-USB port instead of the Type-C port. It also mounts an I2C connector that facilitates connections with many other components, and forms the Grove system where many sensors and actuators that mount this type of door are made available, facilitating connections and disconnections without using welds or other formats.
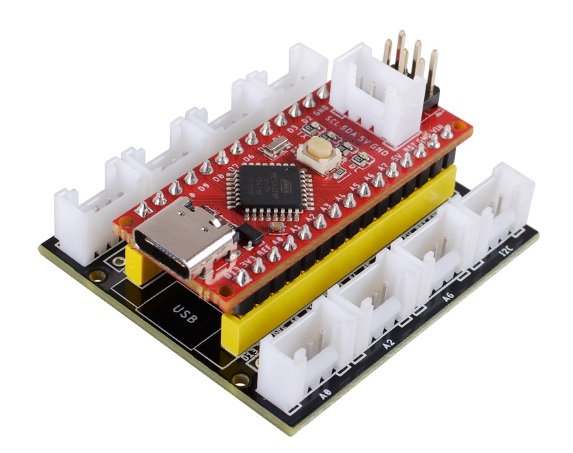
Once I chose the Seeeduino Grove system, I also took the particular shield adapter that allows me to make connections with the other elements of the Grove system in a simple and fast way (also works with Arduino Nano).
And finally I used the Grove system speaker
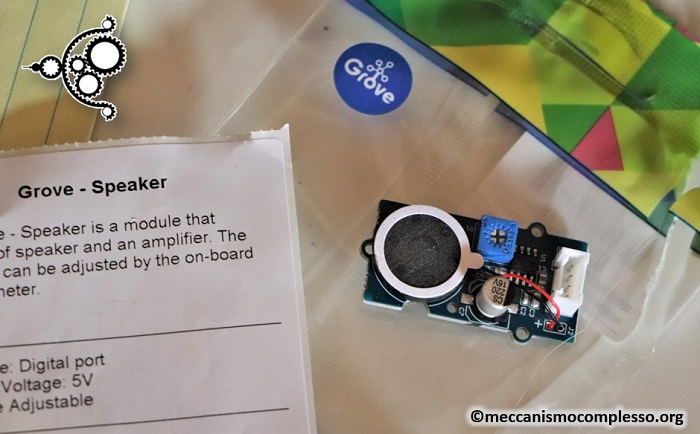
So, once all the components are available, we just have to connect them together. Simple operation to be performed with the Grove system.
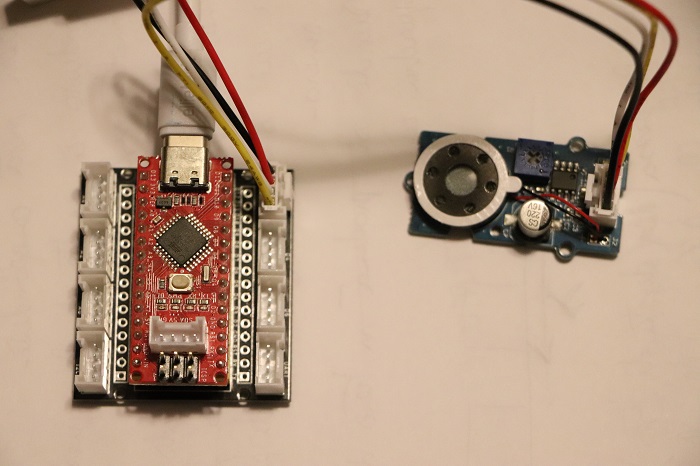
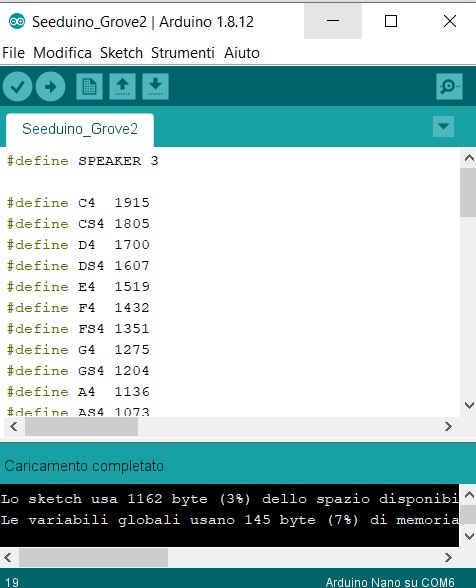
Now connect the Seeeduino board to the computer via the USB and open the Arduino IDE editor to be able to implement the code, compile it and then run it.
Play a melody on Arduino
Once you have made all the necessary connections, you can program a real melody to be played on Arduino. For this example I chose a small jingle taken from Beethoven’s famous “Per Elisa”, known to all, even to the uninitiated !!!
First of all it is important to define all the musical notes, specifying all the wavelengths divided in half for each note corresponding to the fifth and fourth octave of the musical scale (those generally used for all melodies).
You can also use the list of musical notes in another file which you will then import whenever you need it. Then you specify the PIN to which we will connect the sound device.
#define SPEAKER 3
Then it’s time to specify the sequence of notes that make up the first notes of “Per Elisa” and the duration of each note, through two different arrays.
And finally we move on to the actual sketch, in which we implement the commands necessary to execute each note represented in the array through a square wave with the wavelength corresponding to the known one. The single note will be expressed through the implementation of the sound () function, while the execution of the entire melody is done by the for loop present in the loop ().
void setup()
{
  pinInit();
}
void loop()
{
  for(int note_index=0;note_index<34;note_index++)
  {
    sound(note_index);
    delay(50*timeTab[note_index]);
  }
}
void pinInit()
{
    pinMode(SPEAKER,OUTPUT);
    digitalWrite(SPEAKER,LOW);
}
void sound(uint8_t note_index)
{
 for(int i=0;i<100;i++){
     digitalWrite(SPEAKER,HIGH);
     delayMicroseconds(BassTab[note_index]);
     digitalWrite(SPEAKER,LOW);
     delayMicroseconds(BassTab[note_index]);
  }
}
By running the entire code you will have the melody Per Elisa played continuously.
If you want to perform the same melody on a musical scale based on 432 Hz, all you have to do is calculate the wavelengths of the notes of the fourth and fifth octaves and then replace them with the sketch of the article and try for yourself if there are any differences .
Here are the two octaves in 432 Hz to replace the previous code.
define C4 1946
define CS4 1838
define D4 1736
define DS4 1639
define E4 1543
define F4 1458
define FS4 1377
define G4 1299
define GS4 1225
define A4 1157
define AS4 1092
define B4 1033
define C5 973
define CS5 919
define D5 867
define DS5 818
define E5 773
define F5 729
define FS5 688
define G5 649
define GS5 613
define A5 579
define AS5 546
define B5 515