Introduction
This is the second part of a series of articles dealing with bananas, if you have not read the first part you should take a look
BanaNAS: Installation and Configuration of a NAS server on BananaPi/Pro (Part 1)
Once you have chosen the most suitable solution between BananaPi and BananaPro, in this second part you dedicate to the preparation of BananaPro. You start by assembling and then finish the initial configuration of the operating system, in order to access the web interface of the NAS server. In the interface you will do the actual configuration that will be the subject of the third part of this guide.
How to assemble the BananaPro kit
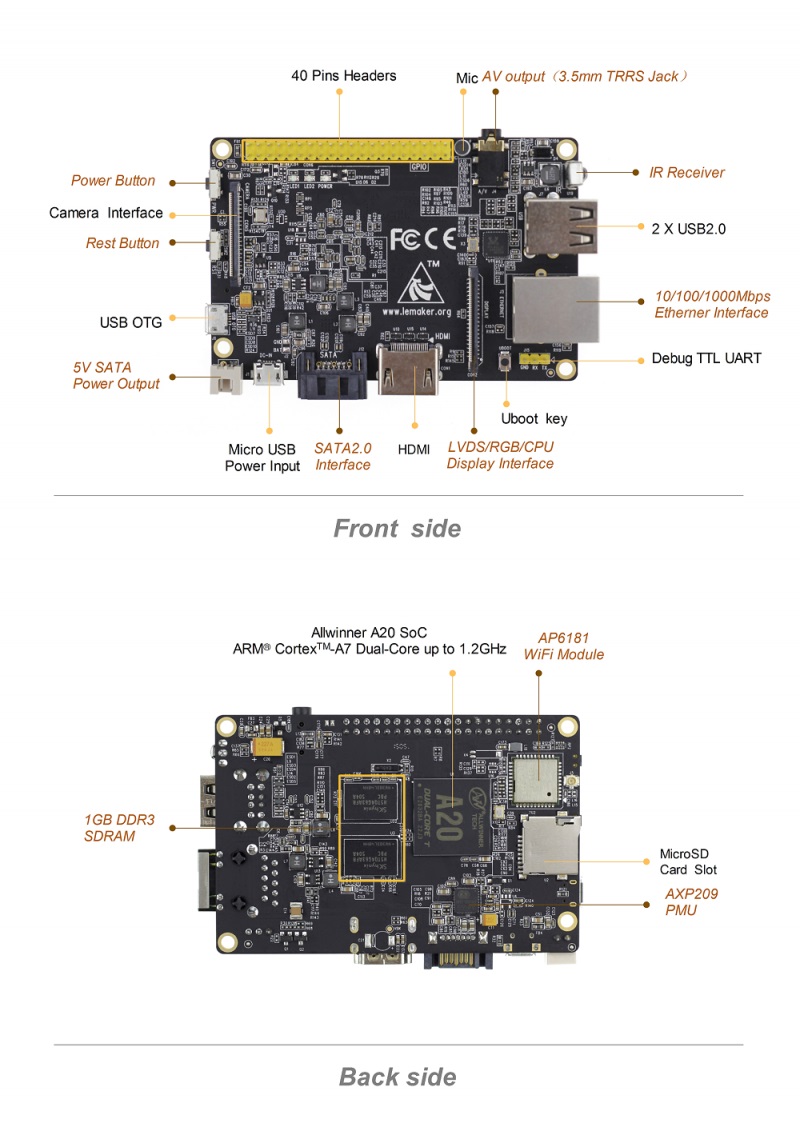
The assembly of BananaPro in its case is fairly intuitive if you bought the kit mentioned in the first part. During assembly I found it difficult to find the link to connect the WiFi antenna. The link in question is behind the board, between the MicroSD card slot, and the AP6181 Access Module, which looks like a small gold button (see image below).
After completing the assembly (BananaPro and Hard Disk inside the homes connected through the SATA cable), connect both the network cable to the router / switch and the power cable into the micro USB power, as shown in the figure.
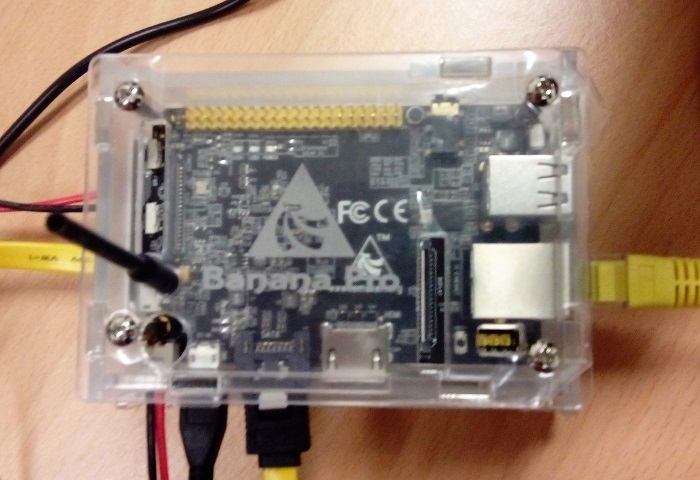
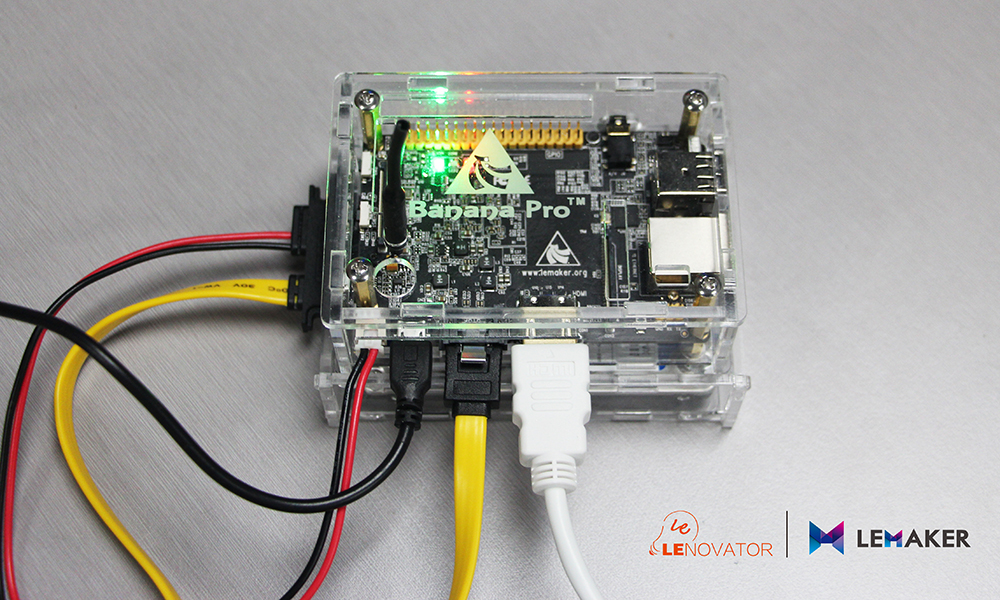
Before connecting it to power you will have to proceed with the transfer of the operating system on the microSD card.
Transfer Operating System into the MicroSD
The software solution that you will install on your BananaPi / Pro, is called OpenMediaVault (OMV) and resides on a Linux operating system.
Going on the official websites of both bananapi/pro s and OMV I realized that in the first place, the OMV present images are not updated and the second site an image to BananaPi / Pro cards was not present,
That said, I have tried to update these images.
BANANA PI IMG OMV:
- omv_3.0.50_bananapi_ita: version with bananian 1604 (debian jessie) and omv erasmus. Language, time zone, and keyboard layout of the operating system configured as Italian. Upgraded to 03 Nov 2016. Link.
- omv_3.0.50_bananapi_en_US: version with bananian 1604 (debian jessie) and omv erasmus. Language, time zone, and keyboard layout of the operating system configured as USA. Updated to 03 Nov 2016. Link.
- omv_2.2.1_bananapi: version on the offial site bananian 1504 (debian wheezy) and omv stoneburner. Language, time zone, and keyboard layout of the operating system to be configured. Updated to 20 May 2015. Link.
BANANA PRO IMG OMV:
- omv_3.0.50_bananapro_ita: version with bananian 1604 (debian jessie) and omv erasmus. Language, time zone, and keyboard layout of the operating system configured as Italian. Upgraded to 03 Nov 2016. Link.
- omv_3.0.50_bananapro_en_US: version with bananian 1604 (debian jessie) and omv erasmus. Language, time zone, and keyboard layout of the operating system configured as USA. Updated to 03 Nov 2016. Link.
- omv_2.2.1_bananapro: version on the offial site bananian 1504 (debian wheezy) nd omv stoneburner. Language, time zone, and keyboard layout of the operating system to be configured. Updated to 20 May 2015. Link.
The posted images have all been tested and are functioning. The procedure for the transfer of the image can be found here. I recommend 7-zip as a program to extract the image from its compressed format.
Once the procedure is completed, insert the microSD into the slot on the board and apply power. At the beginning you will see that, despite not have pressed the power button, the card will automatically turn on.
Initial configuration of the operating system
Before accessing the program’s interface, you will need to finalize some configuration processes. For this you need to connect the BananaPro to a monitor via the HDMI output (for those without the HDMI cable t this one can fit) and also connect a USB keyboard. it is important that the board is also connected to the network via Ethernet cable.
The procedure will be applied on omv_3.0.50_bananapro_ita version but is the same for all the others.
The access to the operating system credentials are, for all images: user: root; password: openmediavault
After logging-in you will have in front of you this screen.
------------------------------------------------------------------------Welcome to Bananian Linux!For news and updates check: https://www.bananian.orgAny questions? Read the FAQ first: https://www.bananian.org/faqRun 'bananian-config' to set up Bananian LinuxRun 'bananian-update' to check for distribution updates------------------------------------------------------------------------root@openmediavault ~ #
Type bananian-config to access the configuration mode of bananian:
root@openmediavault ~ # bananian-config---------------------------------------------------------------------------------Welcome to bananian-config!This script assists you to set up some basic parameters...For news and updates check: http://www.bananian.org---------------------------------------------------------------------------------Your current keyboard layout is 'it'. Do you want to change it? (y/N) N---------------------------------------------------------------------------------Do you want to change your root password? (y/N) N---------------------------------------------------------------------------------Your current timezone is 'Europe/Rome'. Do you want to change it? (y/N) N---------------------------------------------------------------------------------Your current locale is 'it_IT.UTF-8'. Do you want to change it? (y/N) N---------------------------------------------------------------------------------Your current hostname is 'openmediavault'. Do you want to change it? (y/N) N---------------------------------------------------------------------------------Your current hardware configuration is: BananaProDo you want to change it? (y/N) N---------------------------------------------------------------------------------Do you want to expand the root file system (recommended)? (y/N) yExpanding root file system... (ignore the warnings and reboot immediately)[output troncato]
done! please reboot your system now! (shutdown -r now)root@openmediavault ~ # reboot
The configuration panel shows you the various things you can change, such as the keyboard layout, time zone, etc. … You can customize these settings to your liking.
The thing that you absolutely must change is to allow the expansion of the file system. The image that I have made, or available on the official website, is small, 1.8 GB, this to allow a quick download. Once transferred on microSD it will occupy only 1.8 GB of space.
The expansion of the file system is to allow your operating system to use all the available space on the microSD. If you have a microSD 8GB with this operation will allow the system to occupy all 8 GB. This is necessary to ensure enough space for updates and installing plugins to customize your server. Finally restart with the reboot command.
After restarting, you again access (user: root password: openmediavault). To access the web interface of the NAS server must know the IP address. Type the ifconfig command as following:
root@openmediavault ~ # ifconfigeth0 Link encap:Ethernet HWaddr 02:55:04:c2:9f:e1inet addr:192.168.2.29 Bcast:192.168.2.255 Mask:255.255.255.0UP BROADCAST RUNNING MULTICAST MTU:1500 Metric:1RX packets:178 errors:0 dropped:0 overruns:0 frame:0TX packets:203 errors:0 dropped:0 overruns:0 carrier:0collisions:0 txqueuelen:1000RX bytes:18192 (17.7 KiB) TX bytes:25005 (24.4 KiB)Interrupt:117 Base address:0xc000
In my case the IP address of my BananaPro is 192.168.2.29. Once you find the address you can remove the cable hdmi and keyboard to BananaPro since from here on out the NAS server configurations will be made all through a web interface.
Access the OMV web interface
From a PC connected to the same network, open the browser (firefox, chrome, safari …) and, in the URL address bar, type the IP address associated with your BananaPro.
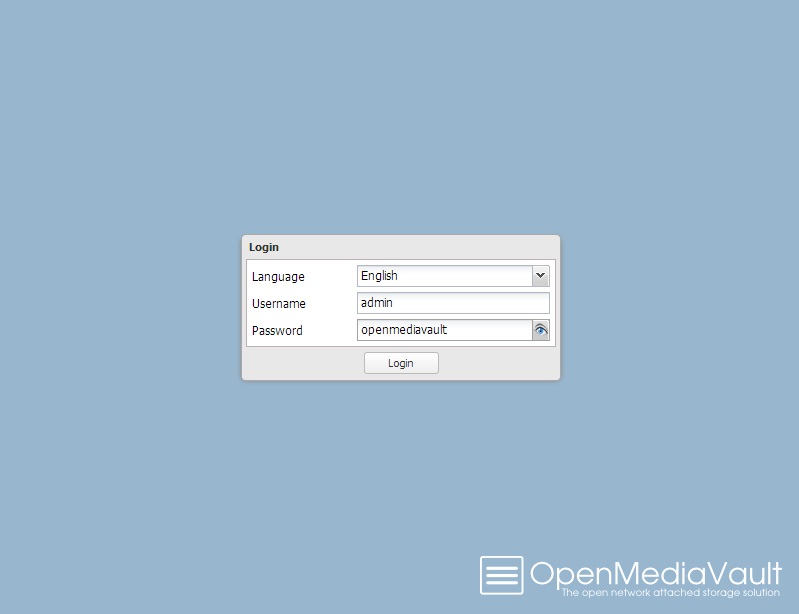
It opens the following web interface.
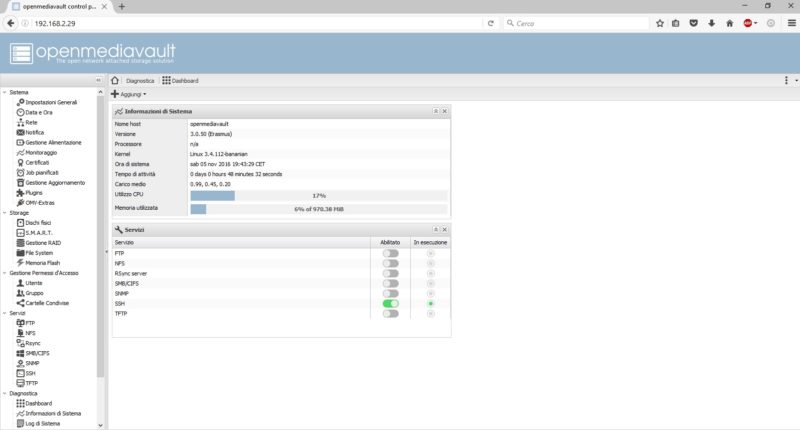
You can select the language of your interest. The logon credentials, for all images are the ones you see in the picture. Once you have made the access, you end up with this screen.
Conclusion
In the third part you will face the initial configuration of the NAS server using OpenMediaVault, everything from web interface. Also I’ll show some speed data transfer test (download and upload) using Gigabit LAN network.[:]

